What are the steps to remodel a basement bathroom cost-effectively
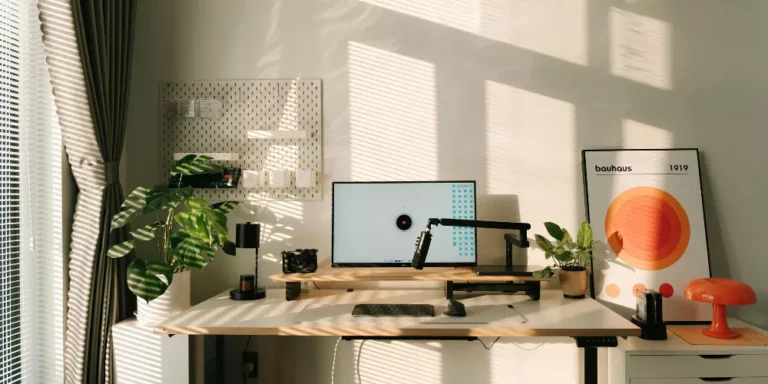
Remodeling a basement bathroom can be a smart investment for homeowners in the USA. A well-designed basement bathroom increases property value and provides convenience for families or guests. Cost-effective remodeling allows homeowners to update the space without overspending. Basements often have unique challenges, including moisture, low ceilings, and limited lighting. Proper planning helps avoid unnecessary expenses and ensures a functional, stylish bathroom.
Understanding the existing plumbing, electrical systems, and layout is essential before starting. Efficient design strategies can maximize space in small or awkward basement areas. Choosing affordable materials that are durable and water-resistant reduces long-term maintenance costs. DIY options can help cut labor expenses while maintaining quality. Planning ventilation and lighting upgrades ensures comfort and prevents moisture issues. Remodeling can also include energy-efficient fixtures to lower utility costs. Selecting budget-friendly finishes does not mean sacrificing style or functionality.
Prioritizing essential upgrades over luxury features keeps the project affordable. A cost-effective basement bathroom remodel can include reusing fixtures and materials where possible. Researching local suppliers and comparing prices ensures the best value. Basements often have uneven floors or walls that require leveling before remodeling. Planning storage solutions and layout efficiency optimizes usability. Safety measures, including proper electrical installation, are critical. A step-by-step approach ensures budget control and project success. Thoughtful planning and material selection make remodeling a basement bathroom manageable and rewarding.
What are the steps to remodel a basement bathroom cost-effectively
Remodeling a basement bathroom cost-effectively requires careful planning, smart material choices, and efficient labor management. Here are ten essential steps:
Plan the Layout and Design
Start by measuring the basement bathroom accurately. Consider existing plumbing locations to avoid costly relocations. Sketch a layout with space for fixtures, storage, and movement. Use online design tools or software for visualization. Prioritize functional zones such as shower, toilet, and sink areas. Evaluate ceiling height limitations and adjust fixture choices. Consider traffic flow to avoid cramped spaces. Incorporate built-in shelving or cabinets to maximize storage. Include lighting placement in the initial plan.
Plan for accessibility if needed, including grab bars or walk-in showers. Check building codes for required clearances and ventilation. Choose design elements that suit your style and budget. Include flooring, wall finishes, and color palette in the plan. Decide whether to include additional features like a linen closet or vanity. Determine if you will reuse existing fixtures or buy new. Planning reduces surprises and cost overruns. Include space for electrical outlets and lighting fixtures. Decide on energy-efficient upgrades if budget allows. Plan around natural light or artificial lighting enhancements. Create a realistic timeline to coordinate steps efficiently.
Inspect Plumbing and Electrical Systems
Before remodeling, inspect existing plumbing for leaks, corrosion, or blockages. Ensure water supply lines and drainage are adequate for new fixtures. Check the condition of electrical wiring and circuits. Confirm outlets are GFCI-protected for safety in wet areas. Identify areas where upgrades or repairs are necessary. Document current system layouts for reference during remodeling. Consider hiring a licensed plumber or electrician for inspections. Replace old pipes or wiring where needed to prevent future issues. Ensure adequate ventilation to avoid moisture-related damage.
Verify sump pumps or drains are functioning properly in basements. Plan water-efficient fixtures to save costs over time. Check for existing lighting fixtures and evaluate upgrade needs. Make note of switch locations for optimal convenience. Address any code violations before proceeding with remodeling. Upgrading plumbing and electrical systems may prevent expensive future repairs. Identify areas suitable for DIY repairs versus professional work. Maintain detailed notes for budget allocation. Planning inspections early prevents delays during construction. Proper system evaluation ensures safety and functionality.
Set a Realistic Budget
Determine the maximum budget for the remodel, including materials, labor, and contingency. Research average costs for basement bathroom projects in your area. Allocate funds for essential items like plumbing, fixtures, and flooring. Reserve a portion for unexpected repairs or upgrades. Compare prices from multiple suppliers for the best deals. Decide on areas where cost savings are possible without compromising quality. Consider DIY work for tasks like painting or tiling to reduce labor costs. Prioritize spending on durable, water-resistant materials. Avoid expensive custom features if budget constraints exist.
Factor in permits or inspection fees if required. Include tools or rental equipment in the budget if necessary. Allocate funds for lighting and ventilation improvements. Account for disposal or removal of old materials. Track expenses carefully to avoid overspending. Adjust the plan if costs exceed budget projections. Consider financing or incremental upgrades for larger projects. Budgeting early helps control costs and avoids last-minute compromises. Use online calculators for accurate cost estimation. Keep a record of all quotes and receipts. Regularly review budget versus actual expenses during remodeling.
Choose Cost-Effective Materials
Select durable, affordable materials that withstand moisture and wear. Options include ceramic tiles, vinyl flooring, and water-resistant wall panels. Reuse existing cabinets or vanities where possible. Look for discounted or surplus materials at local suppliers. Compare brands for price versus quality balance. Consider laminate countertops instead of natural stone. Opt for pre-fabricated shower stalls rather than custom-built units. Choose paint or wall finishes suitable for basement humidity. Select energy-efficient fixtures that save costs long-term. Prioritize materials that are easy to install to save labor costs. Evaluate waterproofing membranes or sealants for cost versus durability.
Select standard-sized tiles to avoid cutting waste. Choose fixtures with simple designs for budget-friendly installation. Evaluate lighting fixtures with affordability and efficiency in mind. Consider low-maintenance options for longevity. Use materials that complement each other aesthetically. Avoid overly trendy materials that may become outdated quickly. Ensure all materials comply with safety and building codes. Consider semi-professional or DIY-friendly options to reduce installation costs. Select versatile materials suitable for future updates or style changes.
Prepare the Basement Area
Clear the bathroom of old fixtures, debris, and furniture. Ensure the floor is level and walls are clean. Repair cracks, holes, or water damage before installing new materials. Remove mold or mildew if present using proper safety precautions. Protect adjoining rooms from dust or water damage. Ensure plumbing and electrical shut-offs are accessible. Confirm adequate lighting for work areas. Check for adequate ventilation to reduce moisture buildup. Remove old flooring, wall panels, or tiles if necessary. Dispose of debris responsibly to avoid additional costs. Prep work ensures a smoother remodeling process.
Accurate measurement during preparation prevents material waste. Seal or waterproof floors before installation of new surfaces. Inspect structural elements for hidden damage. Preparation reduces errors and additional labor costs. Include safety measures such as gloves, goggles, and masks. Preparation sets the foundation for a professional-looking finish. Proper preparation saves time and money during construction. Plan workflow to reduce interruptions. Prepping the area helps maintain an organized worksite.
Install Flooring and Waterproofing
Start with waterproofing the floor to prevent leaks and moisture damage. Use water-resistant underlayment or membranes suitable for basements. Install cost-effective flooring such as vinyl, ceramic tiles, or waterproof laminate. Ensure proper leveling and alignment to avoid future issues. Use adhesive, grout, or click-lock systems depending on material. Add baseboards or trim for a finished appearance. Check that flooring meets safety standards and is slip-resistant. Waterproofing prevents mold growth and structural damage. Prepare expansion gaps if required for certain flooring types.
Use durable materials that withstand heavy use and water exposure. Proper installation extends the life of the floor. Consider DIY installation for simple materials to reduce labor costs. Measure and cut carefully to minimize waste. Coordinate flooring installation with plumbing fixtures. Maintain clean surfaces to ensure adhesive bonding. Allow materials to acclimate to basement conditions before installation. Follow manufacturer instructions to avoid damage. Layering proper waterproofing with durable flooring enhances long-term value. Inspect installation before proceeding to wall finishes. Flooring is a critical foundation for a cost-effective remodel.
Install Fixtures and Plumbing Fixtures
Select cost-effective, durable fixtures including sinks, toilets, faucets, and shower units. Reuse existing plumbing where possible to reduce costs. Install fixtures according to manufacturer instructions for safety and performance. Use standard-sized fixtures to avoid custom fabrication costs. Consider water-saving models to reduce utility bills. Coordinate placement with layout plans for optimal spacing. Verify that all connections are secure and leak-free. Add showerheads and taps that balance affordability with quality. Ensure proper drainage and venting to prevent future issues.
Verify that all fixtures comply with local plumbing codes. Use DIY or semi-professional installation for simple fixtures. Test all plumbing before covering walls or floors. Inspect for leaks during initial use. Consider flexibility for future maintenance or replacements. Group plumbing tasks together to minimize labor hours. Choose fixtures that complement the bathroom style. Ensure fixtures are durable and easy to maintain. Installation sequencing prevents damage to other remodel elements. Proper fixture installation enhances function and value. Use cost-effective accessories like towel racks and mirrors.
Upgrade Lighting and Ventilation
Basements often have limited natural light; plan energy-efficient lighting solutions. Use LED fixtures to save electricity and improve brightness. Add recessed lighting or wall sconces to evenly illuminate the space. Install ventilation fans to prevent moisture buildup and mold growth. Select cost-effective models with timers or humidity sensors. Coordinate wiring with the electrical inspection plan. Consider daylight or motion sensors to reduce energy costs. Position lights to minimize shadows and enhance aesthetics. Ventilation placement should promote proper airflow throughout the room. Use low-maintenance lighting fixtures to save long-term costs. Combine overhead and task lighting for functionality.
Ensure fan capacity is suitable for basement size. Install lighting switches conveniently near entry points. Verify compliance with electrical codes. Proper lighting and ventilation improve comfort and longevity of the remodel. Select energy-efficient options to reduce operating expenses. Coordinate installation with flooring and wall treatments. Maintain clean ductwork or vent paths for performance. Upgrades enhance tenant satisfaction and property value. Lighting and ventilation improvements are essential for functional basement bathrooms.
Apply Wall Finishes Cost-Effectively
Use affordable, moisture-resistant wall finishes such as tiles, panels, or waterproof paint. Consider partial tiling or accent walls to save on material costs. Install wall panels or wainscoting to hide imperfections without painting. Use standard-size tiles or panels to reduce cutting waste. Consider peel-and-stick options for temporary or rental-friendly solutions. Ensure proper adhesion and sealing to prevent water damage. Coordinate wall finishes with flooring and fixtures for cohesive design. Use neutral or light colors to enhance brightness in basement spaces. Install trim or moldings to provide polished edges.
Waterproof paint or panels extend longevity in damp areas. Layering finishes can create visual depth affordably. Coordinate installation sequence to prevent damage to other elements. Minimal tools are required for simple wall treatments. Partial updates can refresh the space without full coverage. Maintain clean surfaces during and after installation. Affordable wall finishes increase aesthetic value without overspending. Ensure proper curing and drying for long-lasting results. Mix textures for visual interest without high cost. Wall finishes are key to a complete and stylish remodel. Cost-effective selection supports budget goals.
Add Storage and Finishing Touches
Incorporate affordable storage solutions like shelving, cabinets, or under-sink organizers. Use wall-mounted options to save floor space. Add mirrors, towel racks, and small decorative items for function and aesthetics. Ensure finishing touches complement fixtures and overall style. Include waterproof or moisture-resistant accessories where appropriate. Organize items to maximize space efficiency. DIY or modular storage options reduce costs. Coordinate finishes with wall and flooring materials. Install hooks or racks for convenience and practicality. Use budget-friendly accessories that add visual interest.
Ensure accessibility and functionality in small basement spaces. Combine storage with design features for cohesive look. Organize plumbing access panels discreetly. Final touches make the bathroom inviting and complete. Add lighting near storage for visibility. Include non-slip mats or rugs for safety. Verify all hardware is secure and durable. Accessories can be upgraded gradually to control costs. Thoughtful finishing touches enhance comfort and usability. Completion of storage and décor rounds out a cost-effective remodel.
Conclusion
Remodeling a basement bathroom cost-effectively is achievable with careful planning and smart choices. Start by measuring the space and planning the layout efficiently. Inspect plumbing and electrical systems to prevent future issues. Set a realistic budget that includes materials, labor, and contingency funds. Choose durable, affordable materials suitable for moisture-prone areas. Properly prepare the basement area, repairing any damage before installation.
Install waterproof flooring and secure wall finishes for longevity. Select and install fixtures carefully, prioritizing standard sizes and energy efficiency. Upgrade lighting and ventilation to improve comfort and reduce utility costs. Add storage solutions and finishing touches to complete functionality and style. Combining these steps ensures a stylish, functional, and cost-conscious remodel. Reusing or repurposing existing fixtures reduces expenses.
Prioritize essential upgrades over luxury items to maintain budget control. DIY or semi-professional work can lower labor costs without sacrificing quality. Layering affordable materials creatively enhances aesthetic appeal. Efficient planning prevents delays and material waste. Proper sequencing of installation steps maximizes workflow and efficiency. Ventilation and lighting improvements prevent moisture and safety issues.
Cost-effective remodeling balances practicality, style, and functionality. Thoughtful execution ensures long-term durability and homeowner satisfaction. Following these steps provides a basement bathroom that is attractive, functional, and financially sustainable.