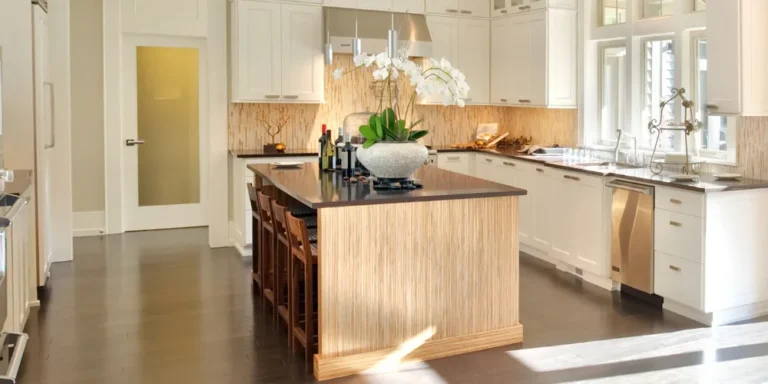
What Are the Best Ways to Install a Track Lighting System in Open Spaces?
Track lighting has become a popular choice for open spaces in homes, offices, and studios across the USA. It combines flexibility, functionality, and style, making it ideal for living rooms, kitchens, lofts, and commercial areas. Unlike fixed lighting, track lighting allows you to adjust the direction of each light to highlight specific areas or objects. Open spaces often require versatile lighting solutions that can adapt to changing layouts and décor. Track lighting is energy-efficient when used with LED bulbs and can reduce electricity costs over time. Installing track lighting can create layers of light, improving both ambiance and visibility. It can emphasize architectural features, artwork, or focal points within a room. Track lighting systems come in a variety of designs, finishes, and track lengths to suit different aesthetic preferences. They can be mounted on ceilings, walls, or even suspended from high ceilings in large spaces.
The modular nature of track lighting allows homeowners to add, remove, or reposition lights without rewiring. Track lighting installation can be a cost-effective upgrade compared to rewiring for multiple individual fixtures. It complements other lighting options, such as recessed lights, floor lamps, and pendants. Properly planned track lighting enhances safety by illuminating walkways and functional areas. Modern track systems support dimmable lights, creating versatile moods for different activities. They are suitable for residential, commercial, and creative studio environments. Track lighting can transform an open space into a visually appealing, well-lit environment. Energy-efficient bulbs and smart lighting controls improve sustainability. Adjustable fixtures allow precise focus for task lighting, accent lighting, or ambient lighting. Track lighting blends practicality with design, making it a top choice for open-concept spaces. Professional or DIY installation ensures the system is safe, functional, and aesthetically pleasing.
What Are the Best Ways to Install a Track Lighting System in Open Spaces?
Installing a track lighting system in open spaces requires careful planning, proper tools, and an understanding of lighting needs. This guide covers ten key strategies to achieve an effective and stylish track lighting installation.
1. Plan the Layout of Your Track
Planning the layout ensures even lighting coverage and functionality. Many USA homeowners start by measuring the room and mapping the intended track placement. Consider high-traffic areas, workspaces, and focal points. Draw a diagram marking the track path, ensuring it avoids obstructions like ceiling fans, vents, or beams. Determine the number of track sections needed to span the area. Allow space for light fixtures to be spaced evenly along the track. Plan for future additions or modifications. Consider the aesthetics of the track alignment—straight, curved, or L-shaped designs. Choose a central or perimeter location depending on the room’s function. Ensure adequate clearance from walls and furniture. Position tracks to minimize shadows in key areas. Check ceiling height to ensure fixtures illuminate surfaces effectively. Allow for maintenance access to bulbs and track connectors. Consider the style of track heads and their adjustability. Planning the layout reduces trial-and-error during installation. Proper planning ensures balanced light distribution throughout the open space. A well-planned track layout enhances both function and design.
2. Choose the Right Type of Track
Selecting the correct track type ensures compatibility and performance. Many USA homeowners choose between H, J, or L track systems based on voltage and fixture requirements. H-track typically supports line-voltage systems. J-track is common for low-voltage setups. L-track is versatile and compatible with multiple fixture types. Consider the amperage rating for all attached lights. Match the track type with the selected light heads. Confirm the track system supports dimmers if needed. Choose track materials—aluminum is lightweight and durable. Select finishes like white, black, or brushed metal to match décor. Verify that the track allows the desired number of fixtures. Some tracks are flexible for curves, ideal for open spaces. Ensure compatibility with LED or halogen bulbs. Check manufacturer recommendations for maximum wattage per track. Choose a system that allows easy repositioning of fixtures. Proper track selection reduces installation issues. The right type improves longevity and safety. Consider modular designs for future upgrades. Choose tracks that complement the room’s aesthetics. Track type influences brightness, versatility, and usability.
3. Determine Electrical Requirements
Proper electrical planning ensures safety and performance. Many USA homeowners identify the voltage and amperage needed for their lighting system. Decide if the track will connect to a standard 120V outlet or require a dedicated circuit. Calculate the total wattage of all track heads. Ensure the existing circuit can handle the load without tripping breakers. Use dimmers or smart switches for energy efficiency. Check if wiring is accessible or if conduit is required for concealed installation. Evaluate ceiling box locations for main power feed. Confirm compatibility with LED, halogen, or fluorescent fixtures. Plan for future upgrades or additional lights. Verify that all electrical components comply with the National Electrical Code (NEC). Safety measures include grounding and circuit protection. Consider professional assessment if unsure about wiring capacity. Use quality electrical components to avoid hazards. Ensure switches are conveniently located. Confirm power source supports adjustable track heads. Electrical planning reduces the risk of short circuits. Proper voltage prevents fixture overheating. Accurate calculations ensure long-term reliability.
4. Select the Best Fixture Styles
Choosing the right fixture style affects both function and design. Many USA homeowners select adjustable heads for task or accent lighting. Spotlight heads focus on artwork, counters, or seating areas. Flood heads provide general ambient light. Pendant-style heads add decorative appeal. Choose LED bulbs for energy efficiency and long life. Match fixture finish with track color for cohesive design. Select sizes proportional to room dimensions. Adjustable heads allow flexibility in light direction. Fixtures should complement furniture, décor, and wall colors. Choose dimmable options for versatile lighting. Fixture style affects brightness, spread, and focus. Ensure compatibility with your chosen track type. Select heads that are easy to install or reposition. Consider glare reduction features for comfort. Mix and match fixture types for layered lighting. Decorative fixtures can serve as design accents. Proper fixture choice enhances both utility and aesthetics. Fixture selection contributes to a balanced, well-lit space.
5. Prepare the Ceiling Surface
A smooth, stable ceiling ensures safe track installation. Many USA homeowners patch cracks, fill holes, and sand surfaces before mounting tracks. Ensure the ceiling material supports screws or anchors. Locate joists or studs for secure attachment. Mark positions accurately using a level and tape measure. Consider painting the ceiling before installation for a clean look. Avoid placing track over weak spots or vents. Remove existing fixtures or obstructions. Clean surfaces to improve adhesive or anchor adhesion. Confirm the surface is dry and free of debris. Reinforce drywall with anchors if needed. Proper preparation prevents sagging or detachment. Ceiling prep ensures even, straight track alignment. Use chalk lines or laser levels for accuracy. Consider ceiling height for fixture placement. Preparation reduces installation errors. A sturdy ceiling supports long-term track stability. Proper prep minimizes repairs or adjustments later. Ensure the surface can support wiring and connectors. Ceiling readiness ensures a professional-looking finish.
6. Install Mounting Hardware and Track
Mounting the track securely is critical for safety. Many USA homeowners start by installing screws, brackets, or anchors into ceiling studs. Use a level to maintain straight alignment. Connect track sections with provided joiners or couplers. Ensure electrical connections are secure before finalizing the track position. Test fit all components for spacing and alignment. Tighten screws to manufacturer specifications without overtightening. Support long track sections with temporary props if needed. Check that all track ends are flush and stable. Maintain proper spacing between fixtures to avoid shadows or uneven lighting. Follow manufacturer instructions for ceiling types. Ensure mounting hardware is rated for fixture weight. Confirm track is centered over key areas. Align tracks with room layout and furniture. Inspect hardware for damage before installation. Secure track supports to prevent sagging. Adjust alignment as necessary for aesthetics. Verify that electrical connectors are accessible. Track installation forms the foundation of the system. Secure mounting ensures durability and safety.
7. Wire the Track System
Proper wiring ensures safe and functional lighting. Many USA homeowners connect track wiring to the main power source via junction boxes. Turn off the main breaker before beginning any connections. Use wire nuts and connectors to join wires securely. Match hot, neutral, and ground wires according to color codes. Run wires through conduit or raceways if required. Confirm correct polarity to prevent flickering or short circuits. Test connections with a voltage tester before turning power on. Route wires to avoid heat sources or sharp edges. Keep wires organized to simplify maintenance. Label connections for future reference. Follow NEC and local code requirements. Use quality materials to ensure reliability. Check compatibility with dimmers or smart controls. Avoid overcrowding junction boxes. Maintain sufficient slack for adjustments or repairs. Inspect wiring for damage before powering the system. Professional electricians can ensure compliance and safety. Wiring is essential for reliable operation of all fixtures. Proper wiring prevents fire hazards and performance issues.
8. Install and Adjust Light Heads
Attaching and adjusting light heads allows precise control over illumination. Many USA homeowners place heads at focal points like countertops, seating areas, or artwork. Loosen heads to rotate, tilt, or aim light beams. Ensure heads are securely fastened to avoid movement. Adjust beam angles to eliminate shadows or glare. Combine flood and spotlight heads for layered lighting. Test lighting from multiple positions for optimal coverage. Adjust head height if track allows vertical movement. Check spacing between heads to avoid overlapping illumination. Consider aesthetics when positioning heads. Use adjustable heads to highlight changing décor or layouts. Verify fixture alignment with ceiling or wall design. Test dimming or smart features. Keep cords and connectors neat and organized. Ensure heat dissipation for halogen or high-wattage bulbs. Proper adjustment enhances function and appearance. Periodically recheck head positions after installation. Avoid blocking fixtures with furniture or decorations. Head placement determines the effectiveness of the lighting design.
9. Test the System Thoroughly
Testing ensures safety and performance. Many USA homeowners turn on the power and check each light head individually. Confirm that all bulbs illuminate without flickering. Test dimmer switches, timers, or smart controls. Check for overheating of track, fixtures, or wiring. Verify correct polarity and proper grounding. Inspect all mounting points for stability. Adjust light angles to correct shadows or glare. Test from different parts of the room to ensure coverage. Look for uniform brightness across all track heads. Ensure motion sensors or automation work as intended. Verify energy-efficient operation with LED fixtures. Inspect cords and connectors for signs of strain. Test for compatibility with other lighting systems in the room. Perform periodic checks after installation. Confirm compliance with local safety codes. Troubleshoot any malfunctioning lights immediately. Testing improves longevity and performance. Test system under different scenarios—daylight and nighttime. Proper testing ensures reliability and safe operation.
10. Maintain and Upgrade as Needed
Regular maintenance extends system life and ensures optimal lighting. Many USA homeowners clean tracks and heads periodically to prevent dust buildup. Replace burnt-out bulbs promptly. Inspect electrical connections and mounting hardware annually. Upgrade to energy-efficient LED heads as technology improves. Adjust light angles to accommodate room layout changes. Replace damaged components with compatible parts. Periodically test dimmers, switches, or smart features. Update firmware for smart lighting systems if applicable. Keep a record of installation details and manuals. Plan for additional track sections for expanding lighting coverage. Ensure safe handling during cleaning or maintenance. Avoid moisture exposure to prevent damage. Check for loose screws or sagging track. Upgrade heads for improved brightness or aesthetics. Use appropriate replacement bulbs for color temperature and wattage. Maintenance ensures consistent lighting performance. Plan upgrades to match remodeling or décor changes. Regular upkeep extends safety and energy efficiency. Track lighting systems can last many years with proper care. Proper maintenance maximizes investment and functionality.
Conclusion
Installing a track lighting system in open spaces enhances flexibility, functionality, and style. Careful planning of layout and track type ensures balanced light coverage. Electrical preparation, including circuits, wiring, and grounding, is essential for safety. Selecting fixture styles, adjusting heads, and integrating dimmers allows customization for tasks, ambiance, and accents. Preparing the ceiling and installing mounting hardware ensures a stable, professional finish. Wiring, testing, and head adjustment guarantee reliable operation and effective lighting. Regular maintenance and potential upgrades extend system life and improve performance. Track lighting systems can complement other lighting solutions for layered illumination. Thoughtful placement highlights focal points, reduces shadows, and enhances aesthetics. Future-proofing allows easy additions, smart integration, and energy efficiency. Proper installation transforms open spaces into functional, stylish, and well-lit areas. Professional or DIY approaches can achieve excellent results with planning and care. Track lighting adapts to evolving design, furniture arrangements, and technology. Dimmable and smart-enabled systems provide energy savings and convenience. Accurate layout planning prevents uneven lighting and reduces glare. Ceiling preparation ensures safety, stability, and a polished appearance. Choosing durable components prevents wear, sagging, or failure over time. Track lighting installation improves usability for large, open areas in homes or offices. Layered lighting enhances ambiance, task efficiency, and overall room experience. Incorporating all steps ensures a reliable, attractive, and functional track lighting system.