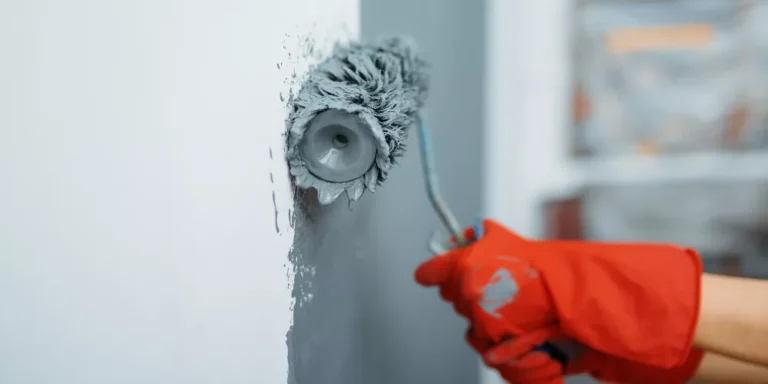
How can I create a simple DIY backsplash using peel-and-stick tiles
A backsplash can dramatically enhance the look and functionality of a kitchen. In the USA, many homeowners are choosing DIY options to update their spaces without spending a fortune. A backsplash protects walls from spills, grease, and moisture while adding style and personality to the kitchen. Traditional tile installation often requires professional labor, grout, and special tools, which can be time-consuming and costly. Peel-and-stick tiles have emerged as a convenient and affordable solution for homeowners looking for quick upgrades. These tiles are easy to apply, come in a variety of colors, patterns, and textures, and can mimic the look of ceramic, stone, or glass. DIY peel-and-stick backsplash projects allow homeowners to personalize their kitchen without permanent commitment. They are also removable, making them ideal for rentals or temporary designs. The installation process is straightforward, and with proper preparation, even beginners can achieve a polished look. Peel-and-stick tiles are also low-maintenance, requiring minimal cleaning. They are suitable for most smooth, clean surfaces, including walls, backsplashes, and even furniture or appliances. This guide provides step-by-step instructions and tips to create a simple DIY backsplash using peel-and-stick tiles. Following these steps ensures a professional appearance while keeping costs low. It also helps homeowners transform their kitchen in a single weekend. By combining creativity with practicality, peel-and-stick tiles offer a modern, stylish, and functional solution for kitchen upgrades. Proper planning, preparation, and attention to detail are key to a successful DIY project.
How can I create a simple DIY backsplash using peel-and-stick tiles
Creating a peel-and-stick backsplash is a quick and budget-friendly way to enhance your kitchen. The process requires minimal tools, no grout, and allows for flexible design choices. Here are the main steps and considerations for a successful DIY project.
1. Choosing the right peel-and-stick tiles
Selecting the right tiles is the first step. Consider color, pattern, size, and material. Popular options include vinyl, faux ceramic, and metallic designs. Choose tiles that match the overall style of your kitchen. Consider the kitchen size and wall space to determine the number of tiles required. Measure carefully to avoid shortages or excess. Some tiles come with peel-off backing, while others require adhesive. Check product reviews to ensure durability and water resistance. Choose materials that are easy to clean, especially near cooking areas. Consider textures for added visual appeal. Tile thickness may affect application on uneven walls. Matching or contrasting grout lines can create different looks. Budget is also a factor—some premium designs may cost more. Peel-and-stick tiles are versatile and can complement modern, rustic, or classic kitchens. Choose a style that enhances your kitchen while staying functional. Ensure tiles are suitable for high-moisture areas. Selecting tiles at the start helps plan the layout accurately.
2. Measuring and preparing the wall
Accurate measurement ensures a clean, professional look. Measure the height and length of the wall area to determine the number of tiles needed. Mark reference lines with a level and pencil for guidance. Clean the wall thoroughly, removing grease, dust, and dirt. Fill holes or cracks with spackle and sand smooth. Peel-and-stick tiles adhere best to smooth, clean surfaces. Remove electrical outlet covers and switch plates to avoid interference. Mask areas not covered by tape to prevent accidental stickiness. Consider starting at the center for symmetry. Dry-fit tiles on the wall to visualize spacing. Ensure vertical and horizontal alignment. Preparation prevents gaps, bubbles, or uneven placement. Double-check measurements before cutting tiles. Proper wall prep increases adhesion and longevity. Using a damp cloth, remove cleaning residues and allow the wall to dry. Accurate measurement is critical for a professional finish.
3. Planning the layout
A well-planned layout reduces errors and ensures symmetry. Start by determining a focal point, such as behind the stove or sink. Dry-lay tiles to visualize spacing, alignment, and patterns. Decide whether you want a full wall coverage or a partial backsplash. Consider staggered or straight grid designs. Plan cuts for edges, outlets, and corners. Ensure that tiles line up with cabinets and countertops for a cohesive look. Mark key points on the wall with a pencil. Factor in tile size to avoid tiny slivers at edges. Adjust placement to balance aesthetics and practicality. Plan for overlapping or trimming as needed. Consider vertical vs horizontal orientation. Layout planning avoids last-minute corrections. Dry-fitting also helps identify any irregularities in the wall surface. A thoughtful plan ensures a uniform and polished appearance.
4. Cutting tiles to fit edges and corners
Peel-and-stick tiles can be trimmed to fit walls accurately. Use a utility knife or straight edge to score tiles before snapping them cleanly. For irregular shapes or outlets, make precise cuts to ensure a seamless fit. Measure each area carefully before cutting. Cutting tiles in batches helps maintain consistency. Retain extra pieces for future repairs or adjustments. Cutting against edges or corners may require patience to avoid uneven lines. Make sure cut edges face areas less visible if possible. Sand rough edges lightly for a smooth finish. Proper cutting ensures that tiles meet neatly without gaps. Check alignment after each cut. Trimmed tiles should maintain adhesive backing integrity. Using a cutting mat or protective surface prevents damage to countertops. Accurate cuts improve overall visual appeal. Always double-check measurements before cutting. Small adjustments at edges enhance professional appearance.
5. Peeling and sticking tiles
Peel-and-stick installation is straightforward but requires care. Start with the first tile at a marked reference point. Peel the backing carefully, avoiding contact with the adhesive. Align the tile with your pencil lines and press firmly against the wall. Smooth out air bubbles from the center outward using a squeegee or cloth. Continue with subsequent tiles, maintaining alignment and spacing. Apply consistent pressure to ensure adhesion. Overlap slightly if recommended by the manufacturer. Work in small sections for better control. Avoid repositioning tiles multiple times, as adhesive may weaken. Check alignment frequently to maintain straight lines. Use spacers if necessary for consistent gaps. Press edges and corners to secure tiles. Clean any adhesive residue immediately. Proper installation ensures durability and a clean finish.
6. Dealing with outlets and switches
Electrical outlets and switches require careful attention. Remove covers before installation. Cut tiles to fit around boxes precisely. Use a utility knife to create neat openings for outlets. Ensure tiles do not obstruct the function of switches or sockets. Reinstall covers after tiles are in place. Check that tiles are flush with the outlet surface. Avoid overlapping tiles over screw holes. Safety is critical—turn off electricity if needed. Outlets should remain accessible for maintenance. Proper handling prevents damage to both tiles and electrical components. Measure and mark positions carefully before cutting. Recheck alignment after fitting. Clean around outlets for a neat appearance. Precision ensures the backsplash looks professional.
7. Pressing and smoothing tiles for adhesion
Even adhesion prevents peeling and bubbles. Use a roller or squeegee to press each tile firmly against the wall. Start from the center and move outward. Smooth edges and corners for full contact with the surface. Pay attention to overlapping or seams. Reapply pressure after all tiles are in place. Check for gaps or misalignment. Adjust slightly before adhesive sets. Some tiles benefit from additional pressure along edges for a stronger bond. Consistent smoothing ensures longevity. Clean smudges or fingerprints immediately. Proper pressing prevents lifting over time. Check tiles for uniform height. Smooth surfaces create a professional finish. Repeat on all tiles systematically. Well-adhered tiles resist heat, moisture, and daily use.
8. Finishing edges and corners
Edges and corners provide the final polished look. Trim any excess tiles for a neat finish. Use corner trims or caulk to cover gaps and improve aesthetics. Ensure edges align with countertops, cabinets, and walls. Apply a thin bead of clear caulk if needed for a seamless appearance. Smooth corners with a finger or cloth. Proper finishing prevents peeling and moisture damage. Use matching trim for a cohesive look. Check alignment with adjacent tiles. Finishing edges enhances the overall visual appeal. Avoid sharp corners that may catch debris. Inspect all edges before completing the project. Properly finished edges contribute to durability and professional appearance.
9. Cleaning and maintenance
Peel-and-stick tiles are low maintenance but require regular cleaning. Wipe with a damp cloth or mild soap solution. Avoid abrasive cleaners that may damage the surface. Clean spills immediately to prevent staining. Regular cleaning keeps tiles shiny and fresh. Inspect seams for lifting periodically. Reapply adhesive or trim edges if necessary. Avoid excessive moisture exposure in high-humidity areas. Use gentle cleaning products suitable for vinyl or faux materials. Dust tiles to prevent buildup. Proper cleaning preserves adhesive integrity and appearance. Keep cleaning tools soft and non-abrasive. Check for scratches or marks and repair as needed. Regular maintenance ensures a long-lasting backsplash. Well-maintained tiles enhance kitchen aesthetics. Avoid harsh chemicals for durability. Proper upkeep prolongs both beauty and functionality.
10. Tips for a professional finish
Several tips improve the finished look of a DIY backsplash. Use a level to maintain straight lines. Plan the layout before starting. Work in small sections to prevent errors. Trim carefully around outlets and corners. Apply consistent pressure for adhesion. Dry-fit tiles for accuracy. Keep surfaces clean and free of debris. Use high-quality peel-and-stick tiles for durability. Address moisture-prone areas with extra precautions. Take your time to avoid rushing. Use spacers for uniform gaps. Clean edges and seams for a neat appearance. Maintain tools and cutting surfaces. Double-check alignment frequently. Consider accent or pattern tiles for visual interest. Protect counters during installation. Apply caulk for a finished edge. Inspect for bubbles or misaligned tiles. Professional attention to detail enhances the overall result. Following these tips ensures a kitchen backsplash that looks stylish, modern, and durable.
Conclusion
Creating a DIY backsplash with peel-and-stick tiles is an affordable and accessible way to upgrade a kitchen in the USA. These tiles provide style, protection, and ease of maintenance without professional labor. Proper planning, measuring, and layout ensure a polished and symmetrical look. Cutting, fitting, and aligning tiles around edges and outlets creates a professional finish. Pressing and smoothing tiles firmly ensures long-lasting adhesion. Edges and corners can be finished with caulk or trims for a seamless appearance. Regular cleaning and gentle maintenance keep tiles looking fresh and prevent peeling. Choosing high-quality tiles and following step-by-step installation tips enhances durability and aesthetics. A peel-and-stick backsplash offers flexibility for renters or homeowners who want a temporary yet stylish solution. Attention to detail during installation makes a significant difference in the overall outcome. This type of backsplash complements various kitchen styles, from modern to classic. DIY installation saves money while allowing personalization of colors, patterns, and textures. Using proper tools, safety measures, and layout planning ensures success. Once complete, a peel-and-stick backsplash provides both beauty and functionality. It protects walls from moisture, grease, and stains. Homeowners gain an updated kitchen without major construction. This method is ideal for weekend projects with minimal disruption. Following these practices ensures a long-lasting, attractive, and practical kitchen upgrade. Properly executed peel-and-stick installation increases both the visual appeal and resale value of the home.