How do I determine proper spacing for recessed lights in a ceiling
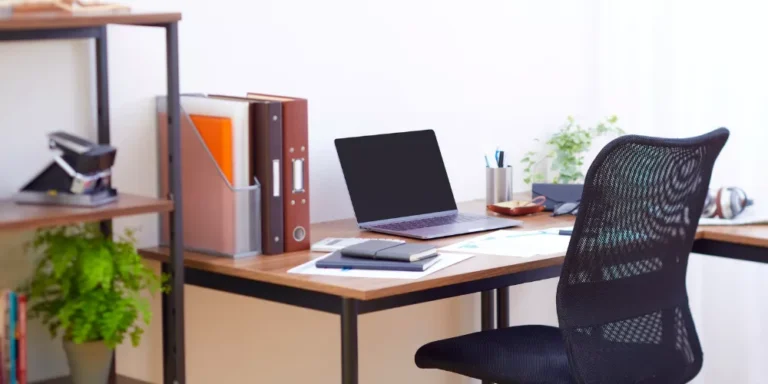
Recessed lighting is one of the most popular choices for modern American homes. It provides clean, unobtrusive illumination that can highlight spaces effectively. Properly spaced recessed lights improve aesthetics, functionality, and energy efficiency. Homeowners often struggle with determining the right placement for ceilings of different sizes and shapes. Factors such as room dimensions, ceiling height, and fixture type influence spacing decisions.
Incorrect spacing can lead to dark spots, uneven lighting, or wasted energy. Well-planned recessed lighting enhances home value and appeal. Lighting can be used for ambient, task, or accent purposes, depending on placement. Designers in the USA often follow standards to achieve uniform light distribution.
Electrical considerations, including circuit load and wiring routes, must be addressed. Energy efficiency is increasingly important, especially with LED fixtures. Dimmers and smart controls add flexibility to lighting design. Lighting plans can affect furniture arrangement and wall displays. Rooms like kitchens and bathrooms require specific attention for task lighting.
Living rooms and bedrooms benefit from a combination of ambient and accent lighting. Hallways and entryways require even illumination without glare. Recessed lighting works well in open-concept spaces.
Proper planning ensures safety, functionality, and aesthetics. Step-by-step planning avoids costly rework or redesign. Understanding spacing principles simplifies installation and enhances the final result.
How do I determine proper spacing for recessed lights in a ceiling
Determining proper spacing for recessed lights requires attention to room size, lighting goals, and fixture specifications. Here are ten key areas to focus on:
Calculate Room Dimensions
Begin by measuring the length, width, and height of the room. Accurate dimensions ensure proper placement and even lighting. Larger rooms require more fixtures or wider spacing. Ceiling height affects the spread of light. Measure obstacles like beams, vents, or ceiling fans. Identify areas needing task lighting, such as counters or reading zones. Consider furniture layout for focused lighting. Draw a floor plan to visualize spacing.
Measure diagonal distances for irregularly shaped rooms. Include allowances for wall-to-wall lighting coverage. Plan for future layout changes if possible. Room function influences light intensity requirements. Higher ceilings may require recessed cans with wider beam spreads. Lower ceilings may need closer spacing to avoid dark spots. Calculate total square footage for lighting density assessment. Accurate measurements prevent under- or over-lighting. Document dimensions for installer reference. Proper calculation forms the foundation of effective lighting.
Understand Fixture Beam Angle
Recessed light beam angles determine how far light spreads. Narrow beam angles provide focused illumination, ideal for accent lighting. Wide beam angles cover larger areas, reducing the number of fixtures needed. Beam spread influences spacing calculations. Inspect manufacturer specifications for degrees of coverage. Adjust spacing to prevent overlapping or dark gaps. Ceiling height affects perceived beam spread. Use narrow beams for highlighting artwork or architectural features.
Wide beams work for general ambient lighting. Determine fixture type: directional or fixed. Consider dimming capabilities for adjustable lighting. Wide beam fixtures may reduce the number of lights required. Avoid clustering narrow beams too closely. Consider beam uniformity for a balanced look. Manufacturers often provide spacing guidelines. Align fixtures with room layout for even coverage. Understanding beam angles prevents lighting inconsistencies. Proper selection enhances aesthetics and functionality. Beam knowledge helps achieve efficient, uniform illumination.
Follow General Spacing Rule of Thumb
A common guideline is to divide ceiling height by two for spacing between lights. For example, an 8-foot ceiling suggests spacing lights about 4 feet apart. This creates even coverage for general illumination. Adjust spacing for higher ceilings or wider rooms. Smaller rooms may require closer spacing to avoid dark areas. Consider room function when applying the rule. Kitchens or workspaces may need tighter spacing. Living rooms or bedrooms may allow wider spacing.
Combine this method with manufacturer specifications for best results. Rule of thumb provides a starting point, not a strict requirement. Adjust for furniture, walls, and obstacles. Use it to estimate the number of fixtures needed. Visualize lighting plan with floor layout. Ensure consistent spacing for symmetry. Avoid placing fixtures too close to walls. Apply rule to both length and width of the room. Use as a quick reference for initial planning. Verify spacing during dry-fit layout before permanent installation. This approach balances efficiency and aesthetics. Proper spacing ensures even light without excess fixtures.
Consider Ceiling Height and Type
Ceiling height greatly affects light spread and spacing. Standard 8-foot ceilings may require 4-foot spacing. Higher ceilings, such as 10-12 feet, require wider spacing or higher-output fixtures. Vaulted or sloped ceilings need adjusted layouts for uniform illumination. Suspended ceilings may limit fixture options. Recessed light trims vary for different ceiling types. Ensure clearance from insulation or joists. Taller ceilings may require adjustable or directional trims. Low ceilings should avoid deep canisters to prevent glare.
Use shallow trims or flush designs for lower heights. Proper ceiling consideration prevents uneven lighting and dark spots. Ceiling structure may influence wiring and installation methods. Ceiling material may affect fixture compatibility. Recessed lights must meet fire safety requirements for insulation contact. Proper planning for height and type optimizes light distribution. Adapting to ceiling variations improves aesthetic results. Consider light intensity to complement room proportions. Correct planning avoids over-illumination or wasted energy.
Plan for Wall-to-Wall Illumination
Wall spacing is important to prevent shadows and dark corners. Generally, place fixtures 2-3 feet from walls. Adjust based on room size and desired brightness. Avoid placing lights directly against walls to prevent glare. Wall distance affects accent lighting effectiveness. Evenly spaced fixtures create uniform ambient light. Highlight architectural features like molding or artwork. Combine wall spacing with general ceiling layout. Use symmetrical placement for visual balance. Consider adjustable fixtures for flexible wall lighting.
Proper spacing prevents uneven shadows and improves aesthetics. Check spacing in combination with furniture placement. Wall-to-wall planning ensures functional light in all areas. Avoid over-lighting walls unnecessarily. Spacing adjustments may vary for narrow or wide rooms. Maintain consistent visual flow across the ceiling. Use lighting simulations if available. Proper planning enhances depth perception and ambiance. Wall-to-wall coverage increases room usability. Uniform illumination reduces eye strain and improves comfort.
Account for Task-Specific Areas
Identify areas requiring focused lighting, such as kitchen counters, desks, or reading nooks. Recessed lights above workspaces may need closer spacing. Consider under-cabinet lighting as a supplement. Adjust ceiling fixture layout to avoid shadows on work surfaces. Include additional lights near sinks, stoves, or study areas. Task lighting enhances safety and functionality. Dimming options allow flexible brightness. Ensure beam direction covers the intended surface. Position fixtures to minimize glare.
Consider adjustable or directional trims for versatility. Balance task lighting with general illumination. Task-specific planning improves productivity and comfort. Avoid placing recessed lights too far apart above work areas. Proper spacing ensures uniform lighting for tasks. Combine with accent lighting for layered effects. Evaluate fixture output relative to surface needs. Well-planned task lighting enhances room usability. Document placement in electrical plan for accuracy. Task-specific adjustments complement overall ceiling lighting design.
Integrate Accent or Decorative Lighting
Accent lighting highlights artwork, shelves, or architectural details. Recessed lights can be spaced closer for accent areas. Use narrower beam angles to create focused illumination. Combine with general ambient lighting for balance. Avoid overlapping beams that create uneven shadows. Consider fixture placement above paintings or feature walls. Directional trims allow flexible accent lighting. Layer lighting to enhance depth and visual interest. Accent spacing is typically closer than ambient spacing.
Adjust placement based on ceiling height and wall distance. Use dimmers to control intensity. Accent lighting adds elegance to functional spaces. Avoid cluttering ceilings with too many accent fixtures. Ensure accent lighting complements room style. Inspect lighting distribution during dry run. Proper accent planning creates focal points and improves aesthetics. Accent spacing enhances mood and perceived space. Combine accent with general lighting for cohesive design. Adjustable features increase versatility. Well-spaced accent lights elevate the overall look.
Avoid Obstructions and Conflicts
Plan spacing to avoid beams, vents, ceiling fans, or light fixtures. Obstructions affect light distribution and fixture installation. Ensure adequate clearance from HVAC ducts. Maintain space from smoke detectors or sprinklers. Avoid placing lights directly above vents to reduce heat impact. Consider ceiling joist spacing for installation feasibility. Check for electrical conflicts with other ceiling systems. Position lights away from door swings or wall-mounted items. Ensure proper spacing for recessed trims to prevent glare.
Avoid interference with decorative ceiling elements. Verify spacing against fire safety and building codes. Pre-plan locations for future ceiling modifications. Inspect potential conflicts during layout visualization. Proper planning avoids costly rework or fixture relocation. Take measurements for precision. Clearance ensures fixture longevity and performance. Obstruction-free spacing improves light uniformity. Adjust plans for irregular ceiling features. Safe placement reduces maintenance challenges. Effective spacing accommodates both function and aesthetics.
Test Layout with Templates or Mockups
Using templates or mockups helps visualize proper spacing. Manufacturer-provided cutout templates are useful. Mark proposed fixture positions on the ceiling. Dry-fit layout ensures uniform coverage and avoids shadows. Simulate light beam spread with lamps or temporary fixtures. Check spacing relative to walls, furniture, and task areas. Adjust positions to achieve balanced illumination. Verify distances for symmetry and aesthetics. Mockups reduce installation errors. Test different beam angles if possible. Consider the impact of dimming or smart controls. Mockups help detect conflicts with ceiling features. Evaluate overall brightness and visual comfort. Temporary layouts allow for spacing refinements. Use ceiling grid measurements for accuracy. Confirm installation feasibility before cutting holes. Mockups prevent uneven lighting and reduce rework. Ensure all marked positions are accessible for wiring. Document final layout for installer reference. Testing layout improves confidence in final design.
Follow Local Codes and Manufacturer Guidelines
Always adhere to building codes and manufacturer spacing recommendations. Codes ensure safety, fire compliance, and proper installation. Manufacturer specifications indicate optimal spacing and fixture limitations. Ignoring guidelines may cause uneven lighting or inspection issues. Local codes may specify clearances from insulation, joists, or other fixtures. Verify electrical load limits and spacing requirements. Some regions require IC-rated fixtures for insulation contact. Adherence ensures energy efficiency and safety.
Document compliance for resale or inspection purposes. Incorporate spacing, wattage, and trim specifications. Review codes regarding emergency lighting or egress paths. Maintain consistent installation practices throughout the home. Codes prevent overheating and fire hazards. Following guidelines improves longevity and performance. Professional installers often require adherence to codes. Compliance reduces liability risks. Proper documentation simplifies future maintenance. Manufacturer and code adherence ensures functional, safe, and attractive lighting. Following rules enhances inspection approval and homeowner confidence.
Conclusion
Determining proper spacing for recessed lights is critical for achieving uniform, functional, and attractive lighting. Accurate room measurements form the foundation for layout planning. Fixture beam angle influences light spread and spacing requirements. Rules of thumb provide initial guidance but should be adapted for ceiling height and room function. Wall-to-wall spacing ensures even ambient lighting and eliminates shadows.
Task-specific areas require closer spacing for effective illumination. Accent and decorative lighting enhance visual interest and highlight architectural features. Avoid obstructions and conflicts with vents, fans, or structural elements. Testing layouts with templates or mockups prevents mistakes and ensures balanced coverage. Following local building codes and manufacturer specifications guarantees safety and compliance.
Proper spacing improves both aesthetics and energy efficiency. Ceiling type and height must be considered for optimal beam distribution. Integrating dimmers and smart controls adds flexibility. Careful planning enhances room usability and comfort. Balanced recessed lighting complements furniture arrangement and wall displays. Properly spaced fixtures prevent dark spots, glare, or overlapping beams.
Uniform illumination supports productivity, relaxation, and home appeal. Professional or DIY installation benefits from detailed planning. Adequate documentation ensures consistent spacing and compliance. Thoughtful design increases home value and inspection approval. With careful attention to these principles, recessed lighting transforms a space into a well-lit, inviting, and functional environment.