How do I plan a media wall with built-in speakers and concealed wiring?
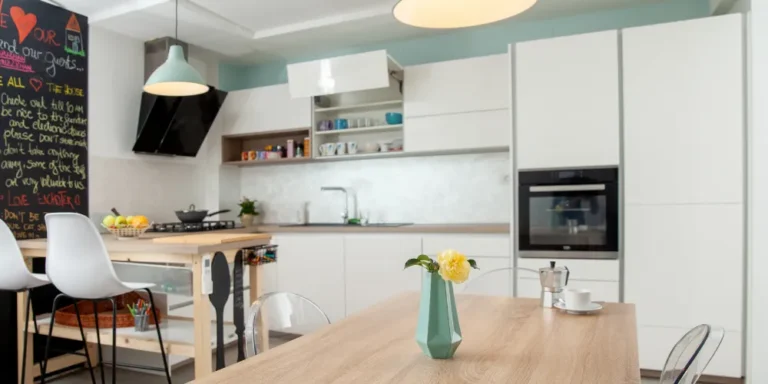
A media wall has become an essential feature in modern American homes, offering both entertainment and aesthetic appeal. It combines a television, audio system, and storage into a single, streamlined wall feature. Built-in speakers and concealed wiring create a clean, minimalist look, eliminating clutter from cords and external devices. Media walls maximize living space while providing an immersive audiovisual experience. They can be customized to fit the size and layout of any room, from compact apartments to large living areas. Proper planning ensures the media wall is both functional and visually appealing. Integrated lighting, shelving, and cabinets can complement the design. Concealed wiring reduces safety hazards and enhances the overall appearance.
Materials like wood, MDF, stone, or metal can be used to match interior décor. Built-in speakers deliver superior sound quality compared to standalone units. Media walls allow for centralized control of devices using universal remotes or smart systems. Adequate ventilation is necessary to prevent overheating of electronic equipment. Strategic placement of the TV and speakers ensures optimal viewing and audio experiences. Media walls can include decorative elements, artwork, or LED accent lighting. Planning for accessibility ensures that devices can be serviced or upgraded easily.
Combining storage and display space keeps entertainment areas organized. Cable management systems hide unsightly wires for a neat finish. Professional or DIY installation can be chosen based on skill level and budget. Thoughtful design creates a seamless integration of technology and style. Overall, a media wall enhances home entertainment, convenience, and aesthetics while maintaining a modern, clean look.
How do I plan a media wall with built-in speakers and concealed wiring?
Planning a media wall requires balancing aesthetics, functionality, and technology. Proper layout, wiring, and speaker placement ensure an immersive audiovisual experience. Step-by-step planning allows a sleek, organized, and safe design. Here are ten essential considerations for building a media wall with built-in speakers and concealed wiring.
1. Determining the Location
Selecting the right wall is crucial for visibility, acoustics, and accessibility. Choose a wall visible from primary seating areas. Avoid walls with excessive windows or direct sunlight that can cause glare. Ensure the wall is structurally sound to support the TV and speakers. Consider proximity to electrical outlets and cable connections. Measure available space for furniture and circulation. Avoid walls with pipes, vents, or structural beams that complicate installation. Plan the media wall height for comfortable TV viewing. Allow space for cabinets, shelves, or decorative panels. Assess room acoustics to avoid echoes or muffled sound. Proper location ensures optimal audiovisual performance and a balanced look. Strategic placement creates a focal point in the room.
2. Planning the Layout and Dimensions
Determine the media wall’s size based on room scale and TV dimensions. Include space for speakers, shelves, cabinets, and decorative elements. Maintain proportion with furniture and surrounding décor. Decide between full-wall coverage or a centered panel approach. Allow extra space for ventilation and access to electronics. Consider modular designs for flexible storage and upgrades. Sketch or use software to visualize dimensions and layout. Plan symmetry for a balanced, professional appearance. Include wiring channels and concealed compartments in the design. Proper layout ensures the wall is functional, organized, and visually appealing. Thoughtful dimensioning prevents overcrowding or wasted space. Layout planning enhances both aesthetics and usability.
3. Selecting Materials
Choose durable and visually appealing materials for the media wall. Wood, MDF, and plywood are popular for custom cabinetry. Stone or brick can add texture and accent elements. Laminates and veneers provide cost-effective, easy-to-clean finishes. Metal panels or trims offer a modern look. Acoustic panels can improve sound quality by reducing echoes. Consider heat-resistant materials near electronic components. Material choice affects wiring concealment and installation ease. Match materials to flooring, wall colors, and room style. Use moisture-resistant materials in areas with high humidity. Proper material selection ensures longevity, style, and safety. High-quality materials provide structural support and aesthetic appeal. Material planning simplifies future upgrades and maintenance.
4. Concealing Wiring and Cable Management
Effective cable management is essential for safety and aesthetics. Plan internal channels or conduits for power, HDMI, and speaker wires. Use wall-mounted raceways or hollow panels for hidden wiring. Avoid sharp bends or kinks that damage cables. Label wires for easy identification during installation and maintenance. Use flexible cables for devices that may move or upgrade. Concealed wiring prevents tripping hazards and clutter. Ensure compliance with electrical codes for safety. Combine wiring with media wall compartments for discreet access. Test all connections before sealing panels or cabinetry. Proper cable concealment creates a clean, professional look. Organized wiring enhances functionality and reduces troubleshooting time. Concealed wiring contributes to the minimalist appeal of the media wall.
5. Integrating Built-in Speakers
Built-in speakers provide immersive sound without external clutter. Plan placement for stereo or surround sound, considering listener positions. Use in-wall or in-ceiling speakers for seamless integration. Ensure speakers are compatible with the TV, receiver, or amplifier. Acoustic considerations improve audio quality and minimize echoes. Allow space for speaker wiring and connection to the main system. Speaker grills should match wall finishes for a cohesive look. Consider directional or adjustable speakers to optimize sound projection. Plan for subwoofer placement if using a surround sound system. Integration should maintain the clean lines of the media wall. Test audio performance before finishing panels or cabinetry. Built-in speakers combine aesthetic appeal with high-quality sound. Proper planning ensures balanced audio throughout the room.
6. Incorporating Storage Solutions
Storage enhances organization and accessibility. Include cabinets for media devices, DVDs, gaming consoles, and remotes. Open shelves can display décor, books, or artwork. Consider drawers for hidden storage and cable access. Adjustable shelving accommodates future device upgrades. Ensure adequate ventilation for electronics in closed cabinets. Sliding doors or panels maintain a clean, unobstructed appearance. Use soft-close hinges for safety and convenience. Combine storage with speaker placement to maintain aesthetics. Functional storage reduces clutter in the living area. Proper storage planning ensures convenience and longevity of devices. Organized compartments create a polished, professional media wall.
7. Planning Ventilation and Heat Management
Electronics generate heat that must be managed to prevent damage. Include ventilation gaps in cabinets or behind panels. Use perforated or mesh panels to allow airflow. Consider installing small fans for active cooling if needed. Avoid enclosing devices in airtight compartments. Position heat-sensitive components away from walls or heat sources. Proper ventilation extends the lifespan of TVs, receivers, and speakers. Include space for cable and device expansion without blocking airflow. Thermal insulation in panels may reduce heat transfer. Plan airflow paths before final assembly of cabinetry. Heat management ensures safety, performance, and durability. Adequate ventilation supports high-quality audiovisual performance. Proper planning prevents overheating and electronic failures.
8. Integrating Lighting
Lighting adds ambiance and enhances media wall visibility. LED strips behind the TV create a soft backlight that reduces eye strain. Accent lighting highlights shelves, speakers, or decorative features. Consider dimmable lights for adjustable ambiance during movie or game time. Recessed spotlights can illuminate key areas without glare. Smart lighting can sync with media playback for dynamic effects. Ensure lighting installation does not interfere with wiring or speaker placement. Choose warm tones for a cozy atmosphere. Use indirect lighting to avoid reflections on the TV screen. Integrated lighting enhances aesthetics while maintaining functionality. Properly designed lighting elevates the visual appeal of the media wall. Lighting improves usability and highlights design features effectively.
9. Ensuring Accessibility for Maintenance
Maintenance access is critical for long-term usability. Plan removable panels or hinged doors for easy access to wiring and devices. Label and organize cables for quick troubleshooting. Allow space to replace or upgrade speakers, amplifiers, or TV components. Avoid permanent sealing of wiring channels. Accessibility ensures regular cleaning and dusting of electronics. Modular designs make future technology integration simple. Include power switches or outlets in accessible locations. Proper planning reduces downtime and maintenance costs. Easy access improves safety when servicing electrical components. Accessible media walls ensure convenience and adaptability over time. Maintenance-friendly design preserves the investment and functionality. Accessible components increase the lifespan of the media wall setup.
10. Planning for Smart Home Integration
Integrating smart home technology enhances convenience and control. Connect TV, speakers, and lighting to smart hubs or voice assistants. Use programmable remotes or apps for unified control. Consider automation for lights, sound, or streaming devices. Smart integration allows remote monitoring and operation. Ensure compatibility of devices and protocols like Wi-Fi, Zigbee, or Z-Wave. Concealed wiring should accommodate future smart upgrades. Smart control enhances both user experience and system functionality. Integration simplifies entertainment, lighting, and audio management. Plan for future upgrades of devices and software. Smart home-ready media walls combine technology, aesthetics, and convenience. Thoughtful integration increases usability and long-term value.
Conclusion
Planning a media wall with built-in speakers and concealed wiring enhances both aesthetics and functionality in American homes. Determining the right location ensures optimal viewing, acoustics, and accessibility. Proper layout and dimensions allow space for TV, speakers, storage, and decorative features. Material selection influences durability, style, and ease of installation. Concealed wiring reduces clutter and improves safety while maintaining a clean appearance. Built-in speakers deliver high-quality sound while preserving a minimalist design. Storage solutions keep media devices organized and accessible. Ventilation prevents overheating, ensuring the longevity of electronic components. Integrated lighting enhances ambiance, usability, and design appeal. Accessibility ensures convenient maintenance, upgrades, and troubleshooting. Smart home integration allows centralized control of devices, lighting, and sound. Proper planning balances aesthetics, technology, and practicality. Modular designs provide flexibility for future upgrades or expansions. Cable management ensures safe, neat, and efficient installation. Attention to acoustics improves the listening experience for all users. Coordinated materials, finishes, and lighting create a cohesive, modern look. Thoughtful planning ensures the media wall is both functional and visually striking. Regular maintenance and accessible design preserve long-term performance. A well-designed media wall combines entertainment, style, and convenience. Overall, integrating built-in speakers and concealed wiring creates a seamless, modern centerpiece for any home. Homeowners enjoy organized, immersive entertainment without sacrificing design or space.