How to insulate outdoor pipes in a crawl space for the winter?
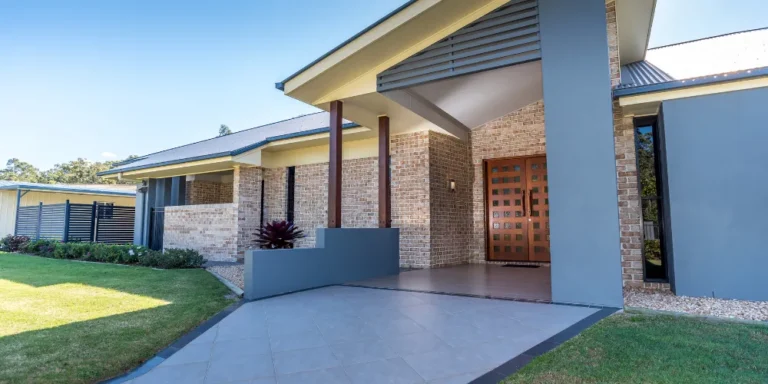
Insulating outdoor pipes in a crawl space is one of the most important winter preparation steps for homeowners across the United States. When temperatures drop, exposed pipes become vulnerable to freezing, cracking, and bursting. This problem is especially common in regions that experience sudden cold snaps. Homes in the Midwest, Northeast, and even parts of the South face this risk every winter. A burst pipe can cause extensive water damage in a very short time. Repairs often cost thousands of dollars and disrupt daily life. Crawl spaces are particularly risky because they are often unheated.
Cold air circulates freely underneath the home. Many homeowners are unaware that pipes in these areas need protection. Builders may not have insulated them properly. Older homes are especially at risk. Even newer homes can have gaps in insulation. Taking the time to insulate pipes is a smart preventive measure. It protects your plumbing system and your home’s structure. It also helps maintain consistent water pressure and flow. Insulation improves energy efficiency during winter. This can lower heating costs over time. Knowing how to insulate pipes correctly matters. Doing it wrong can be just as bad as doing nothing. This guide explains the right way to insulate outdoor pipes in a crawl space for winter.
How to insulate outdoor pipes in a crawl space for the winter?
Insulating outdoor pipes in a crawl space means adding protective materials around water lines to prevent freezing. The goal is to keep pipes above freezing temperatures during cold weather. For U.S. homeowners, this helps avoid burst pipes, water damage, and emergency plumbing repairs. Proper insulation is a practical and cost-effective winterization step.
Understanding why crawl space pipes freeze in winter
Crawl spaces are often the coldest part of a home. They are usually unheated and poorly sealed. Cold air enters through vents, gaps, and foundation openings. When temperatures drop, pipes lose heat quickly. Water inside the pipes expands as it freezes. This pressure causes pipes to crack or burst. Even a small crack can release gallons of water. Many U.S. homes have plumbing routed through crawl spaces. This is common in southern and coastal regions. Homeowners often assume freezing is not a concern in mild climates. However, short cold snaps are enough to cause damage. Wind chill worsens the problem. Uninsulated pipes are especially vulnerable. Metal pipes conduct cold faster than plastic ones. Copper pipes freeze quickly. PVC pipes can crack under pressure. Understanding the cause helps prevent the issue. Freezing is not about snow. It is about sustained cold exposure. Even temperatures just below freezing can cause damage. Awareness is the first step. Knowing why pipes freeze helps you plan insulation correctly. It also highlights the importance of sealing air leaks. Crawl space conditions matter more than outdoor temperature alone. Humidity and airflow play a role. Cold air circulation is the main enemy. Reducing exposure is the goal. Insulation is the primary defense. This understanding shapes all other steps. It explains why insulation must be thorough and continuous.
Identifying which pipes need insulation
Not all pipes in a crawl space need the same level of protection. Focus first on pipes that carry water. Cold water supply lines are most vulnerable. Hot water lines are also at risk when unused. Drain pipes usually do not freeze but can in extreme cold. Look for pipes near exterior walls. Pipes close to crawl space vents are higher risk. Low-hanging pipes are more exposed to cold air. Metal pipes need extra attention. Copper and steel lose heat quickly. Plastic pipes still need insulation. Do not assume they are safe. Check for pipes running parallel to the foundation. These often lack insulation. Inspect areas near entry points. Water lines entering the house are common freeze points. Mark all exposed sections. This helps ensure full coverage. Partial insulation leaves weak spots. Weak spots often cause failures. Take time to inspect thoroughly. Use a flashlight to see dark corners. Look behind ductwork and wiring. Some pipes may be hidden. If unsure, consult a plumber. Professional inspections can identify risks. Knowing what to insulate saves money. It avoids wasting materials. It also ensures protection where needed most. This step sets the foundation for success.
Choosing the right pipe insulation materials
Pipe insulation materials vary widely. Foam pipe sleeves are the most common choice. They are affordable and easy to install. These are available at U.S. home improvement stores. They come in different diameters. Choose the correct size for a snug fit. Fiberglass insulation is another option. It provides higher insulation value. Fiberglass is better for extremely cold regions. It requires careful handling. Protective gloves are recommended. Rubber insulation offers flexibility and durability. It resists moisture better than foam. Heat tape can be used in extreme cases. This provides active heating. Heat tape requires electricity. It must be installed correctly for safety. Do not mix incompatible materials. Follow manufacturer instructions. Cost varies by material. Foam is the most budget-friendly. Fiberglass costs slightly more. Heat tape increases energy use. Choose materials based on climate. Northern states may need higher insulation values. Southern states still benefit from basic insulation. Quality matters more than thickness alone. Cheap insulation degrades faster. Durable materials last multiple winters. Choosing wisely reduces maintenance. The right material ensures long-term protection.
Preparing the crawl space before insulation
Preparation is just as important as insulation itself. Start by clearing debris from the crawl space. Remove old insulation or damaged materials. Wet insulation should be discarded. Moisture reduces effectiveness. Check for standing water. Drainage issues should be addressed first. Insulating wet pipes is ineffective. Seal large air gaps in the foundation. Use expanding foam or caulk. Close unused crawl space vents. Vent covers help reduce cold air entry. Repair torn vapor barriers. Ground moisture affects temperature stability. A clean crawl space is easier to work in. It also allows better insulation placement. Wear protective gear. Crawl spaces often contain dust and pests. Good lighting is essential. Use portable work lights if needed. Check pipes for existing damage. Cracks should be repaired before insulation. Insulation hides problems if installed too early. Addressing issues first prevents future failures. Preparation saves time later. It improves insulation performance. Many homeowners skip this step. This leads to poor results. Taking time to prepare pays off. It ensures insulation works as intended.
How to install foam pipe insulation correctly
Foam pipe insulation is popular because it is simple. Measure the pipe length accurately. Cut insulation sections to match. Most foam sleeves have a slit. Open the slit and fit it around the pipe. Ensure the insulation closes completely. Gaps reduce effectiveness. Secure seams with insulation tape. Use tape rated for cold temperatures. Do not use regular duct tape. Tape joints where sections meet. Pay special attention to elbows and bends. Use pre-formed elbow pieces if available. If not, cut and fit carefully. Avoid compressing the insulation. Compression reduces insulation value. Ensure insulation extends fully to pipe ends. Do not leave exposed sections. At entry points, seal gaps carefully. Foam works best when continuous. Check alignment after installation. Make adjustments as needed. Foam insulation should fit snugly. Loose insulation allows cold air infiltration. Installation should be neat and consistent. Take your time. Rushing leads to missed spots. Proper installation improves performance. This method works well for most U.S. climates. Correct installation makes a big difference.
Using fiberglass insulation for extreme cold areas
Fiberglass insulation provides higher thermal resistance. It is ideal for northern climates. This material comes in rolls or wraps. Wrap pipes fully with fiberglass. Overlap seams for full coverage. Secure with wire or insulation tape. Do not compress fiberglass tightly. Air pockets provide insulation value. Cover fiberglass with a vapor barrier. Plastic wrap helps prevent moisture intrusion. Moist fiberglass loses effectiveness. Protective clothing is important. Fiberglass can irritate skin. Wear gloves and long sleeves. Ensure proper ventilation while working. Fiberglass works well around clusters of pipes. It can insulate multiple lines together. This is common in crawl spaces. Fiberglass handles colder temperatures better than foam. It is more labor-intensive. Installation takes more time. However, performance is excellent. This is often used in colder states like Minnesota and Michigan. It also works well in mountain regions. Professional installers often prefer fiberglass. DIY homeowners can install it carefully. Follow safety guidelines. Correct installation is crucial. Fiberglass is effective when done right. It offers strong winter protection.
Sealing air leaks around pipes and foundation walls
Insulation alone is not enough. Air leaks allow cold air to reach pipes. Seal gaps around pipe penetrations. Use spray foam or caulk. Check where pipes enter the crawl space. These areas often have gaps. Seal foundation cracks if present. Cold air infiltration reduces insulation effectiveness. Closing vents during winter helps. Many crawl spaces have adjustable vents. Close them before freezing weather. Install vent covers if needed. Weather stripping can help seal access doors. Air sealing improves overall home efficiency. It keeps crawl space temperatures more stable. This protects pipes indirectly. Air leaks increase heating costs. Sealing them saves money. It also reduces drafts inside the home. Moisture control improves with air sealing. Less cold air means less condensation. This protects insulation materials. Sealing is inexpensive but effective. Many homeowners overlook this step. It is one of the best improvements you can make. Combined with insulation, it provides strong protection. Take time to inspect thoroughly. Small gaps add up. Sealing improves comfort and safety. This step complements pipe insulation perfectly.
Considering heat tape for added protection
Heat tape provides active freeze protection. It uses electricity to warm pipes. This is useful in very cold areas. Heat tape wraps around pipes. It turns on when temperatures drop. Not all heat tape is the same. Use tape designed for water pipes. Follow installation instructions carefully. Improper use can be dangerous. Never overlap heat tape unless approved. Check electrical outlets for ground fault protection. GFCI outlets are recommended. Heat tape adds energy costs. However, it prevents costly damage. This is often used in remote or exposed areas. It is helpful for pipes near exterior walls. Heat tape should be used with insulation. Insulation improves efficiency. Do not rely on heat tape alone. Regular inspection is necessary. Heat tape can wear out. Test it before winter begins. Replace damaged sections promptly. This solution is common in northern U.S. states. It provides peace of mind during extreme cold. Heat tape is an added layer of protection. Use it strategically. Combine it with good insulation practices. When used correctly, it is very effective. Safety should always come first.
Monitoring insulated pipes throughout the winter
Insulation is not a one-time task. Regular monitoring is important. Check the crawl space during cold spells. Look for signs of moisture. Wet insulation needs attention. Listen for unusual sounds in pipes. Reduced water flow may indicate freezing. Inspect insulation for gaps or damage. Rodents can damage insulation. Repair issues promptly. Use a thermometer in the crawl space. This helps track temperature changes. Keep crawl space access clear. Easy access allows quick checks. If temperatures drop significantly, take extra precautions. Let faucets drip during extreme cold. Moving water freezes less easily. This is a temporary measure. Do not rely on it alone. Monitoring helps catch problems early. Early action prevents damage. This is especially important during prolonged cold spells. Weather patterns can change quickly. Being proactive matters. Insulated pipes are safer but not invincible. Awareness adds another layer of protection. Homeowners who monitor have fewer issues. This habit saves money and stress. Consistency is key. Monitoring ensures long-term success.
Knowing when to call a professional
Some crawl spaces are difficult to access. Tight spaces make DIY work challenging. Complex plumbing layouts increase risk. If you are unsure, call a professional. Licensed plumbers understand local building codes. They know climate-specific best practices. Professional insulation ensures full coverage. They can identify hidden risks. Older homes may have unique challenges. Professionals can recommend upgrades. This may include vapor barriers or encapsulation. Crawl space encapsulation improves overall protection. It also improves indoor air quality. Professional services cost more upfront. However, they reduce long-term risk. Insurance companies may prefer professional work. Documentation can help with claims. If pipes have frozen before, professional help is wise. Recurring issues need expert evaluation. Professionals have specialized tools. They work faster and more efficiently. Calling a professional is not a failure. It is a smart decision in many cases. Know your limits. Safety matters. Professional guidance ensures peace of mind. This is especially true in harsh climates. Reliable work protects your home. When in doubt, seek expert help. It can save you from costly mistakes.
Conclusion
Insulating outdoor pipes in a crawl space is a critical winter preparation step for U.S. homeowners. Cold weather can cause serious plumbing damage if pipes are left unprotected. Understanding why pipes freeze helps guide proper insulation. Identifying vulnerable pipes ensures complete coverage. Choosing the right materials makes a big difference. Preparation improves insulation performance. Proper installation techniques are essential. Sealing air leaks enhances protection. Fiberglass insulation works well in extreme cold. Foam insulation suits moderate climates. Heat tape adds extra security when needed. Monitoring throughout winter catches problems early. Regular checks prevent surprises. Crawl spaces require special attention due to exposure. Preventive action costs far less than repairs. Burst pipes cause water damage and stress. Insulation protects both plumbing and structure. Professional help is valuable in complex situations. Taking action before winter brings peace of mind. A well-insulated crawl space helps your home stay safe, efficient, and problem-free all winter long.